Getting Started with Mystro
Hi there! Curious about Mystro? We hope you are!
We’ve made Mystro for managing your rideshare and other gig apps automatically and hands free. It handles the “which offers to accept or not” part of the process for you so you can focus on driving and not have to do math in your head super quickly. Now you don’t have to worry about missing out on a good offer just because you were in the middle of dodging someone who can’t use their turn signal properly! (Not to mention you can also just ignore all those bad offers super easily without batting an eye.)
It’s not that hard to get started once you get the app installed. Make sure to install the app on the same device you are running your gig apps (Uber/Lyft/DoorDash) on!
Got it installed already? Alright, here’s what’s next (feel free to skip to the part you have questions about):
- Subscribing
- Linking your services
- Going on and offline (the basics)
- Setting your filters (the advanced settings)
Subscribing
Mystro requires an active subscription. (Except during the testing period for certain gig apps and countries).
If you don’t have an active subscription, you’ll be able to poke around the settings but won’t be able to go online in Mystro and actually use it.
The subscription pays for itself pretty quickly; nearly all of our users find that the increase in their earnings outweighs the cost of the subscription.
Your subscription is per device. If you need to move a subscription to a new device, you can do so by using the "Log In" option in the Mystro menu on both devices. This option creates a Mystro profile for you using your phone number (no password or account name needed). If you need any help transferring your subscription, or with anything else, contact Mystro Support.
If you want to check your subscription status, you can find it in the main menu (hit the three bars in the top left on the Drive screen), under Settings, and then Subscription.
If you want to get a free trial, enter the code GETTINGSTARTED.
Linking your services
In order for Mystro to take action on your behalf (so your hands can be free for driving), it will need to be logged into your accounts for the various services you want to use Mystro with (like Lyft, Uber, or DoorDash).
During the linking process, your login information will be sent directly to the gig app. The gig app provides a token, which is stored only on your phone, which lets Mystro see, accept, and decline available offers. Your login information is not stored.
As a reminder: Make sure to link Mystro on the same device that you use the service’s app on.
The linking process will vary depending on your device, region, and which service you’re linking. (For instance, linking Lyft in the US uses your Driver’s License Number and phone number to text you a verification code. Linking Uber uses a different method.)
Pick whichever unlinked service you want to link on the Drive screen and then follow the instructions on screen to link that service.
When you link your first service you will also be prompted to enable the necessary permissions for Mystro to work, such as Location and Notification permissions. Mystro cannot work without the required permissions.
Going online and offline and other basic settings
When teaching someone how to drive a car, a good first thing to teach them is how to brake. It’s always good to know what to do if you get overwhelmed and just want to get everything back under control again, right?
At the bottom of the screen in Mystro is a big orange GO button.
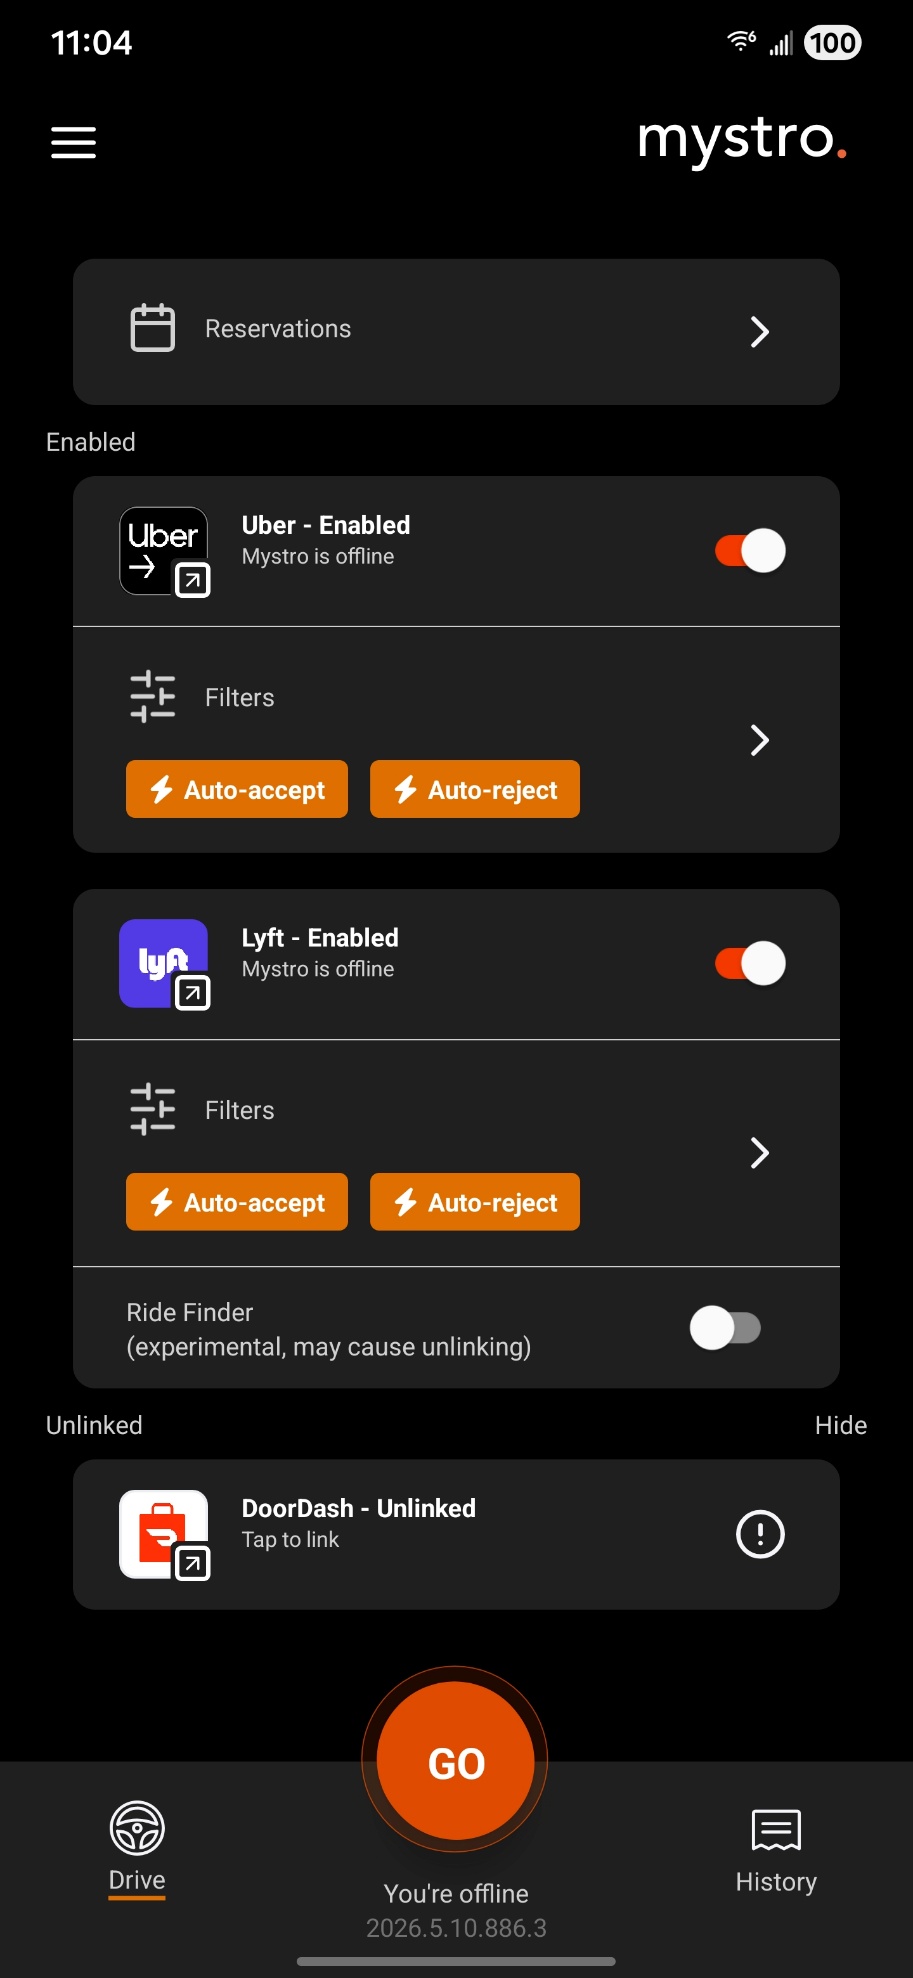
When you’re ready, this is the button you will hit to start Mystro. So where’s the brakes? The same button will turn into the STOP button:
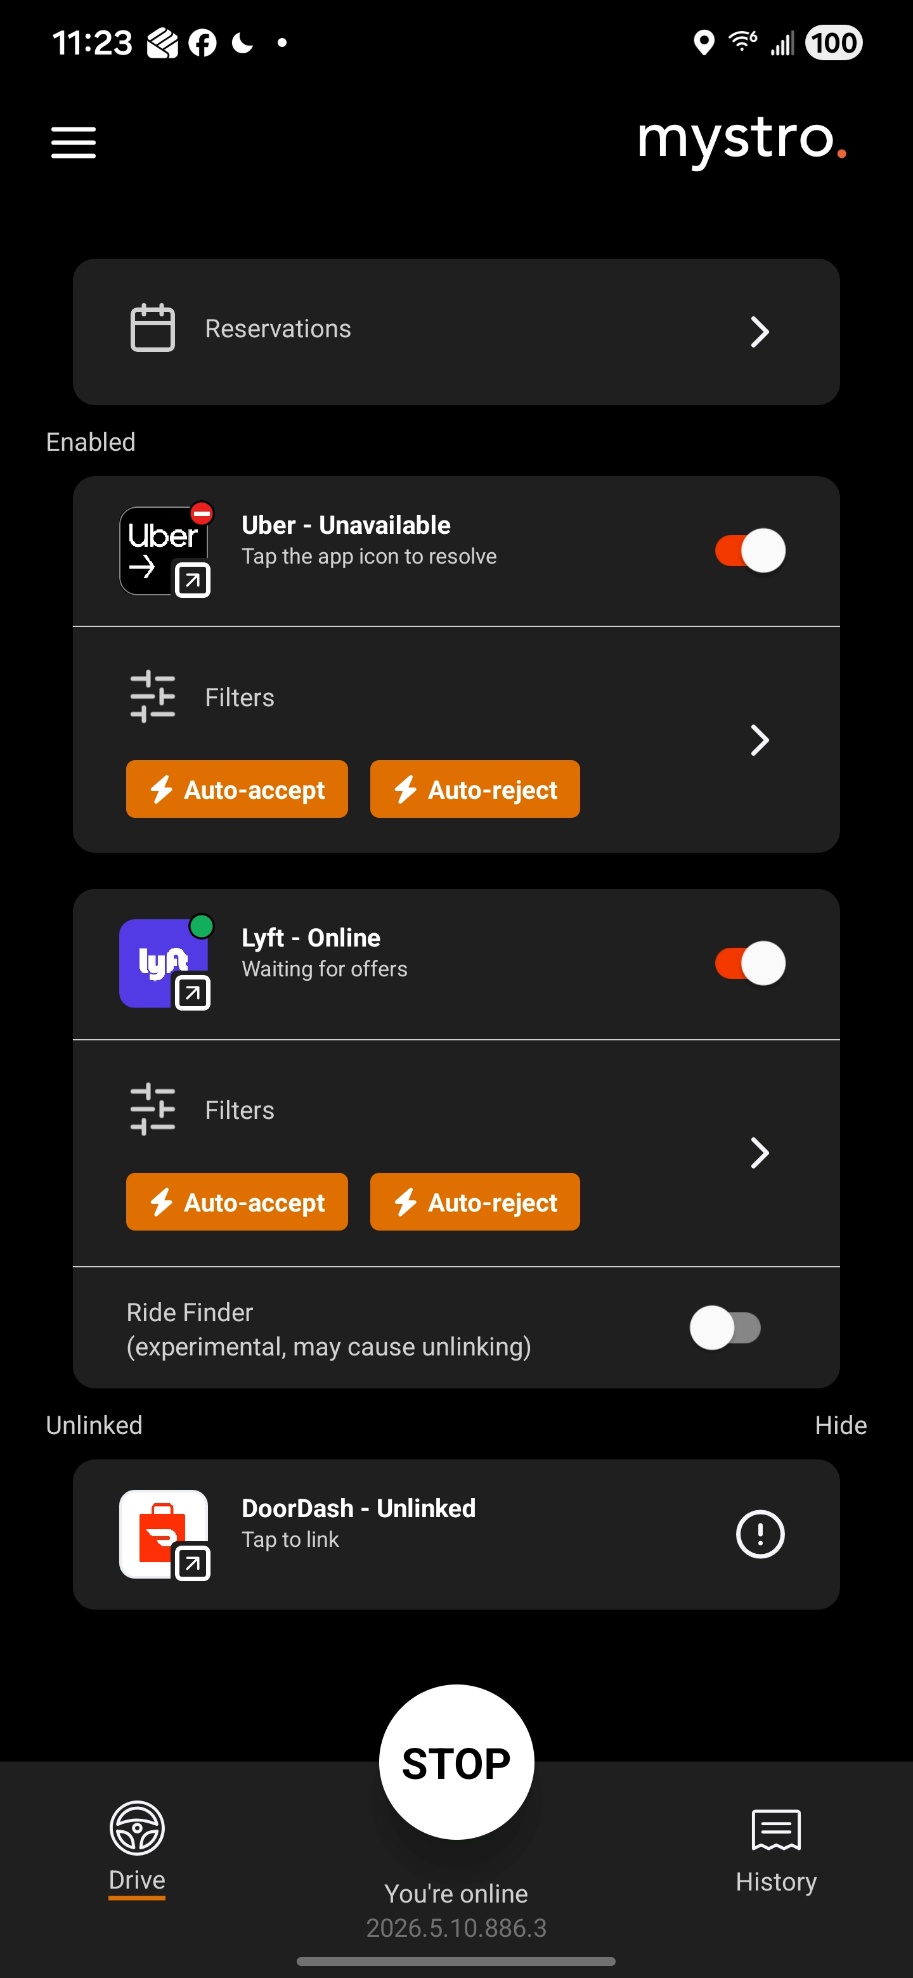
So if you want to stop everything, that’s what you’ll hit.
- GO will start your linked services (that you have enabled), and you will start receiving offers – only do this when you’re ready.
- STOP will stop your linked services, taking them offline, and stop offers: here’s the brakes.
If you want, you can try going online now, and offers will start coming in. Since you haven’t set up any filters yet, offers will be given to you to manually decide if you want them or not. You can hit the accept or ignore buttons, or just ignore them and they’ll time out. This will be very similar to when you’re running an app by itself, but with Mystro you can run multiple apps simultaneously and get them all in one place, plus Mystro will help do math for you (the $/hr and $/mi calculations) so you don’t have to.
But we’ll cover filters in the advanced section, so wait until then! Before we do, let’s cover the two main screens:
The Drive Screen
The Drive Screen is the main screen of Mystro and where you will be most of the time you have this app open. If you need to return to it from the History screen, just tap Drive in the bottom left.
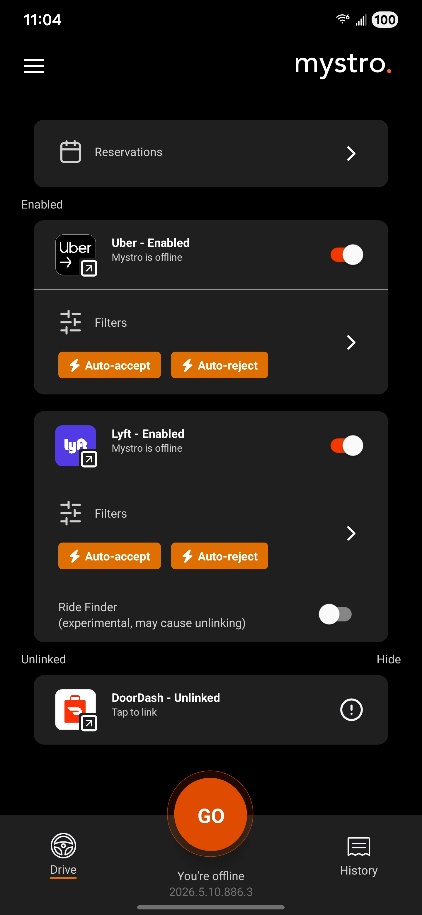
At the top of the screen is Reservations. We’ll cover this in another article as it is a separate way to use Mystro. However once you master everything in this article you’ll probably be able to figure out Reservations yourself!
Next is your Enabled services. These are the services that you have linked and you want Mystro to be connected to and using. The toggle slider to the right enables or disables the service. If any services are linked, but disabled, they will be listed next.
Most of the time you will want all your services to be enabled, but as an example, you might want to only drive Uber so you can finish a quest more quickly and get more Uber rides in.
Another thing to keep in mind: Disabling a service makes Mystro ignore it even if you go online with that service yourself. Make sure you don’t have the service running in the background trying to give you offers!
When you are online, this is where you can see the current status of your services.
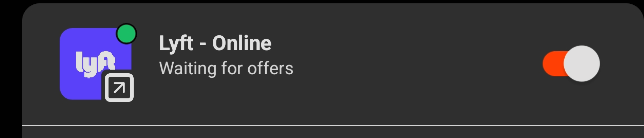

Remember, you have to be online in Mystro and the service both, for Mystro to work and manage your offers for you. If you’re online with the service but not Mystro, then Mystro will do nothing and you’ll miss the offers the service is giving you. If you are online with Mystro but not the service, then Mystro has nothing to do because the service isn’t giving you offers. It has to be both or nothing!
Lastly is your Unlinked services in case you want to link them. If you don’t, you can hit the word Hide to the right to tuck them out of sight and so you don’t accidentally interact with them.
The History Screen
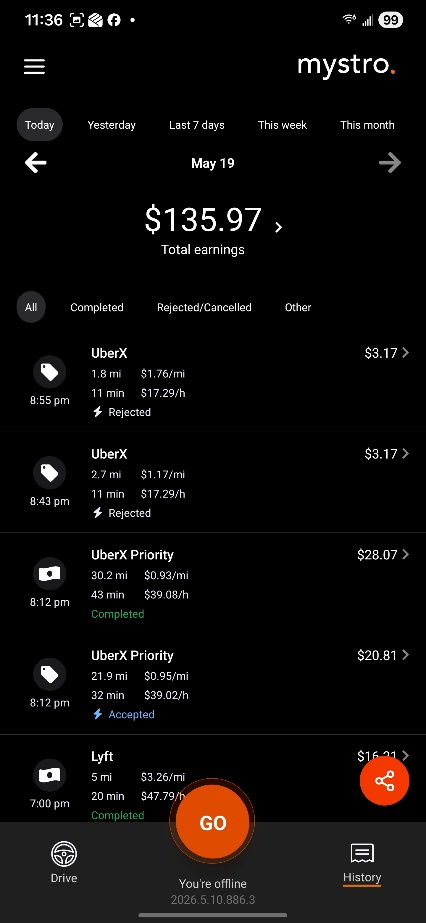
The History Screen can be found by tapping History in the bottom right. This will list every offer you get even the ones that are ignored or rejected. Here’s a brief rundown of this screen:
- You can expand total earnings to get a breakdown by hitting the >
- You can refresh your total earnings by swiping down on the number.
- You can change the time period by selecting one at the top or using the left and right arrows.
- You can filter the offers based on their status.
- You can tap an offer to get more details about that offer (like why it was accepted or rejected.)
- The lightning bolt symbol indicates that Mystro took action (auto accept or auto reject).
- You can share your wins and history easily with others using the orange share button in the bottom right.
Setting your filters (the real fun)
So having all your apps in one place is nice, but the real magic of Mystro is how it will filter and automatically accept offers for you based on your settings. Let’s get started on that!
First, keep in mind that your filters are per service so if you set up filters for Lyft you have to also set up filters for Uber, they don’t carry over.
To adjust filters, go to the Drive screen and tap Filters on the service you want to adjust filters for.
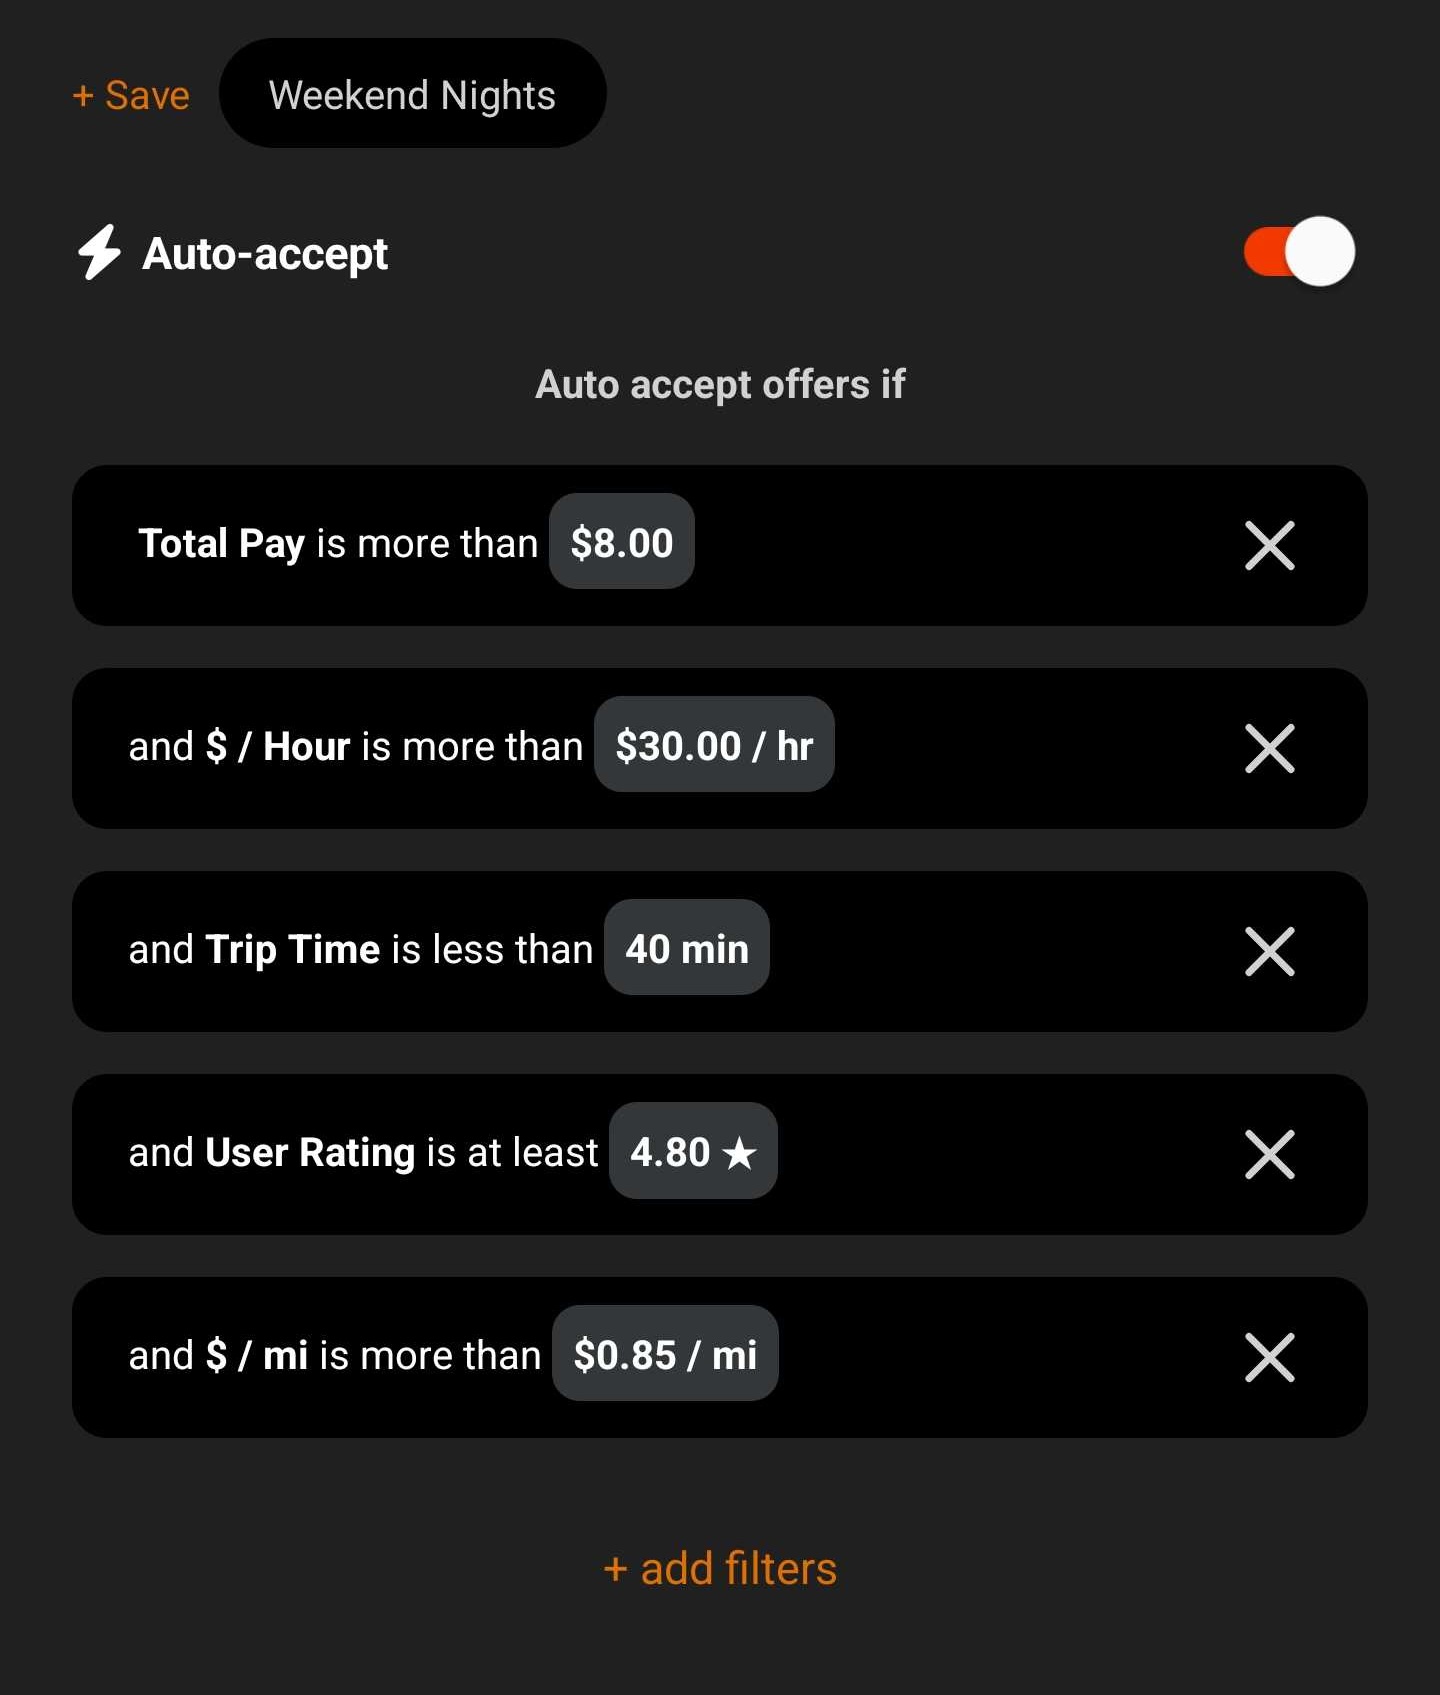
The toggles next to auto accept and auto reject enable them for that service. You can then tap + add filters to add as many filters to either as you want.
Finally, here’s the basic logic Mystro follows:
- If an offer meets ALL of your “auto accept” filters then it will be automatically accepted.
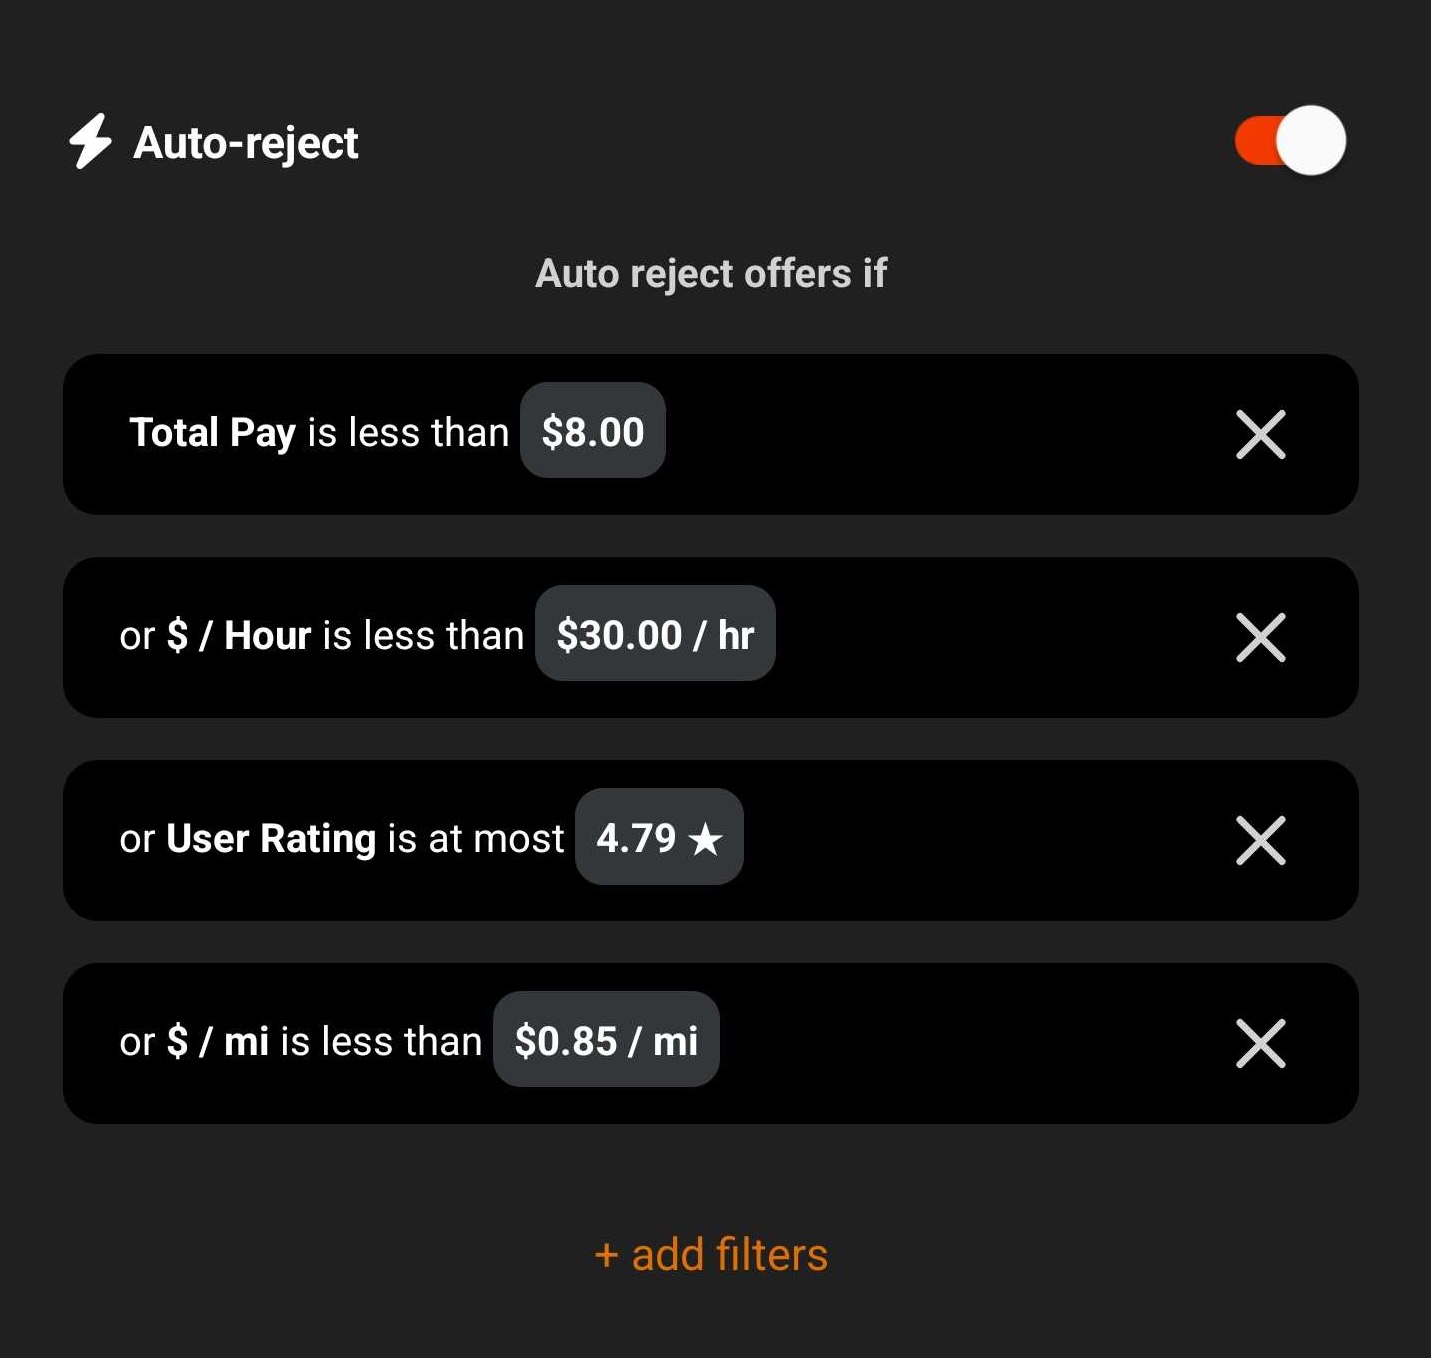
- After checking if it should be automatically accepted, and only if it is not, then Mystro will check if an offer meets ANY of your “auto reject” filters. If it does, then the offer will be immediately rejected.
- If the offer is neither accepted nor rejected, it will display on your screen. If you have auto accept enabled, the parts of the offer that are why it was not auto accepted will be highlighted.
The easiest way to make sure your reject filters always work is to have the same filter type in the auto accept as well (if you have auto accept enabled). So if you have a $/mi filter for rejecting, have a $/mi filter for accepting. If you have a zone for rejecting, have a zone for accepting, and so on.
The filters don’t have to be the exact same value, you can leave a ‘gap’ for what you want to manually review. For instance, if your accept is $30/hr, and your reject is $25/hr, then something that’s $26.17/hr will not get accepted or rejected but will pop up on your screen for you to manually review.
Suggested filters for newbies
Your filters will be up to you. You can go for the strategy of rejecting nearly all rides and only accepting the best of the best, or you can accept nearly all rides and just reject the worst. You can focus on staying in one area, or only short rides, or long rides.
The ‘sweet spot’ is typically where you are filtering for high-paying rides but still getting enough rides that you have little or no downtime. A more advanced and riskier strategy is to have a lot of downtime and only take the exceptionally well paying rides that make up for all the downtime. What your opportunities are will depend on when and where you drive.
Here’s a couple suggestions to get started, though:
- In your auto accept filters, set a maximum Trip Time so that random offers that are multiple hours long don’t get automatically accepted and now you’re on the hook for an 8 hour trip across the country. You can then either have a similar filter in your auto reject filters if you never want those rides, or leave it out of the auto reject filters if you want to manually make a decision when a long ride is offered. We recommend 40 mins as a good default that you can adjust as desired. (You can also use the zone filter to make sure you only accept offers in a certain zone, that works too.)
- Set your $/mi to the cost of running your vehicle. The IRS in the US estimates 72.5 cents a mile (2026 rate), but your car and gas mileage may vary. You may even want to add in some additional profit. Many drivers recommend a flat $1/mi minimum before their tires start moving, but you may need to adjust that to find a sweet spot for your vehicle and where you drive. You should add the “anything over this amount is awesome” to your auto accept filters and the “anything below this amount is trash” to your auto reject filters.
- Set a user rating filter. Common advice shared among drivers is that passengers with a rating below 4.8 are likely to be problems. Add this to both your auto accept and reject filters. You can set this to two digits, like 4.8 for auto accept and 4.79 for auto reject, and adjust to your preference. This will help greatly with your peace of mind while driving!
- Set a Total Pay minimum. It’s up to you, but often the very small and tiny trips (that are only like $3) are more hassle than they’re worth to drive. There’s always the chance that you could get a huge tip from a very generous passenger, and these trips will be very short so they’re good when you want quantity over quality, but otherwise they’re usually not good for your overall earnings. If there’s a minimum amount of “not worth my time to bother with”, set that in your auto accept at least and possibly your auto reject as well. A starting value of $8 can be adjusted to your preference to weed out the small trips.
- Tweak your $/hr as high as you can get it without too much dead time. This will take some experimenting and trial and error. You don’t want your $/hr to be so high that your overall earnings decline due to lack of rides taken. You’ll need to get a feel for your market and the time of day that you drive to find the sweet spot where you get enough offers accepted that you stay busy in spite of how high your $/hr filter is. That’s when your earnings really start to grow!
Extra settings in the filter screen
If you look above auto accept and auto reject, you’ll see the + Save button. This allows you to store your current filter set for later. You can have multiple sets and switch between them easily as each set you add will be listed to the right of the + Save button.
Below the auto accept and auto reject section, you’ll find settings you can set for that specific service. If you don’t like to get offers while you’re already driving, you can turn them off. By default, we allow offers from the same service (so you can form a queue) but block offers from other services (that way you don’t wind up having an active ride on more than one service at a time). But you can adjust those if you want.
There are other settings that will be specific to the service you have selected as well, and you can relink or unlink as needed here.
And off you go!
That’s pretty much it! Explore around with the filters to find your sweet spot, and save different filters for different situations (like events, weekday commutes, or weekend bar nights), and find what works for you! With the right filtering you’ll be making higher earnings in no time!
Frequently Asked Questions
Is Mystro safe? Does it store my Uber or Lyft password?
Mystro doesn’t store your gig-app passwords. During linking, your login information goes directly to the gig app (Uber, Lyft, DoorDash), which returns a session token. The token lives only on your phone and lets Mystro see, accept, and decline available offers on your behalf. You can revoke that connection at any time from your gig app’s account settings.
How much does Mystro cost?
Mystro requires an active subscription per device. For current pricing, open the app and tap Settings then Subscription in the main menu. New drivers can get a free trial by entering the code GETTINGSTARTED during signup.
Does Mystro work for DoorDash?
Yes. Mystro supports DoorDash in addition to Uber and Lyft. You can link multiple services and have Mystro manage offers from all of them at once, including running rideshare and delivery offers side by side.
Can I use Mystro on iPhone or Android?
Mystro is available on both iPhone (App Store) and Android (Google Play). Make sure you install Mystro on the same device that you are running your gig apps on, since Mystro needs to interact with those apps directly.
Does Mystro really auto-accept Uber and Lyft rides?
Yes — that’s the whole point. When you set up auto-accept filters (like minimum $/mile, minimum total pay, or maximum trip time), Mystro automatically accepts incoming offers that match all of your accept criteria. You can also set auto-reject filters to instantly decline offers that meet any of your reject criteria. Offers that fall in between get shown on your screen for you to manually decide.